Unlocking the Magic of Mars Bar Cake: A Retro Classic Reimagined
There are some desserts that transcend mere sweetness, taking us on a nostalgic journey back to simpler times, packed with indulgent flavour. The Mars Bar Cake is undeniably one of these culinary treasures. A beloved retro classic and a firm childhood favourite for many, this treat has graced countless gatherings, cafes, and kitchen tables, consistently delighting all ages with its rich, chocolatey, and delightfully crunchy profile. Whether you remember it from your grandmother's recipe box or discovered it as a café specialty, the mere mention of Mars Bar Cake conjures images of pure, unadulterated indulgence.
This article delves deep into the world of the Mars Bar Cake, exploring its irresistible charm, guiding you through crafting its most popular iterations, and offering expert tips to ensure your creation is nothing short of spectacular. Prepare to fall in love all over again with this gloriously naughty, surprisingly easy-to-make dessert.
The Irresistible Charm of Mars Bar Cake
What makes the Mars Bar Cake so universally adored? Part of its appeal lies in its ingenious combination of textures and flavours. The iconic Mars bar, with its chewy nougat, luscious caramel, and smooth milk chocolate, is a masterpiece in itself. When transformed into a cake, it lends an unparalleled depth of sweetness and a distinctive chewiness that sets it apart.
For many, the no-bake version, in particular, evokes strong feelings of nostalgia. It's the kind of treat that effortlessly brings a smile, reminding us of school fetes, birthday parties, and cosy family gatherings. Its robust flavour profile makes it a satisfying dessert, perfect for curing any sweet craving, while its relative ease of preparation means even novice bakers can achieve impressive results. From a quick weekday pick-me-up to a show-stopping party centrepiece, the Mars Bar Cake effortlessly fits into any occasion, promising a delicious escape from the everyday.
Crafting the Classic No-Bake Mars Bar Cake (The Crispy Indulgence)
The quintessential Mars Bar Cake is often a no-bake wonder, featuring a delightful rice crispy base that is utterly addictive. This version is celebrated for its simplicity and the satisfying contrast between the crisp cereal and the gooey Mars bar mixture, all crowned with a decadent chocolate topping.
Gathering Your Ingredients
To embark on this delightful journey, you'll need a few key players:
- Mars Bars: The star of the show! Standard size bars work best.
- Butter: Unsalted is preferred, to control the overall saltiness.
- Golden Syrup: Adds an essential warmth, depth, and stickiness. Corn syrup or honey can be substituted in a pinch, but golden syrup is traditional.
- Rice Crispies: The crunchy foundation of your cake. Ensure they're fresh for maximum crispness.
- Milk Chocolate: For the glorious topping. High-quality chocolate will make a noticeable difference.
- Vegetable Oil (or Coconut Oil): A small secret ingredient for a perfect topping.
Step-by-Step Perfection: Your No-Bake Guide
Follow these steps to create a flawless Mars Bar Cake:
- Preparation is Key: Begin by lining a 9x9 inch (or 23x23 cm) square cake tin with baking parchment. This crucial step will make it incredibly easy to lift your cake out later without any sticky mishaps.
- Mars Bar Meltdown: Slice your Mars bars into roughly 1cm chunks. This helps them melt more quickly and evenly. Place these chunks into a sturdy saucepan with the butter and golden syrup.
- Gentle Melting Magic: Heat the mixture over a medium heat, stirring occasionally. Be patient, as the Mars bars take a little time to fully surrender their form. Using a whisk can be particularly effective here, helping to break down the nougat and caramel layers as they soften, ensuring a smooth, lump-free mixture. Continue until everything has completely melted and is well combined.
- Crispy Integration: Weigh your rice crispies into a large, heatproof bowl. Once the Mars bar mixture is velvety smooth, pour it immediately over the rice crispies. Using a spatula or large spoon, gently but thoroughly fold and mix until every single rice crispy is beautifully coated in the sticky, sweet Mars bar goodness. This ensures an even texture and flavour throughout your base.
- Firming the Foundation: Transfer the coated rice crispies into your prepared cake tin. Using the back of a spoon or a small spatula, press the mixture down firmly and evenly across the base of the tin. Compact it well to create a sturdy foundation. Once levelled, pop the tin into the fridge to cool and set for a minimum of 30 minutes. This chilling time is vital for the base to firm up before the topping is added.
- The Chocolate Crown: While the base chills, prepare your chocolate topping. Break your milk chocolate into pieces and place them in a heatproof bowl. Set this bowl over a saucepan of simmering water, ensuring the bottom of the bowl does not touch the water. This creates a gentle double boiler, preventing the chocolate from seizing or burning. Stir occasionally until the chocolate is completely melted and smooth.
- The Secret to Slices: Once melted, add one teaspoon of vegetable oil (or coconut oil) to the chocolate. This brilliant trick helps prevent the chocolate from becoming rock hard and cracking when you cut into the cake, making for cleaner, easier slices. Stir until the oil is fully incorporated.
- Final Flourish & Chill: Pour the melted chocolate evenly over the chilled rice crispy base. Using a small spatula, spread it gently to cover the entire surface. Return the cake to the fridge to set completely. This usually takes at least 1-2 hours, or until the chocolate topping is firm to the touch.
- Slice and Serve: Once fully set, remove the cake from the tin using the parchment paper handles. Place it on a cutting board and, using a sharp knife dipped in hot water and wiped clean between cuts, slice it into equal squares or rectangles. Serve and watch it disappear!
Beyond the Basics: Creative Variations and Baked Delights
While the no-bake Mars Bar Cake holds a special place in our hearts, the versatility of the Mars bar extends to a range of other delightful creations. For those who prefer a baked cake, there are equally indulgent options.
The "One-Bowl" Baked Marvel
Some Mars Bar Cake recipes lean into the convenience of a cake mix, transforming a simple chocolate cake into an extraordinary treat. Imagine a rich, moist chocolate sponge, studded with chunks of gooey, melted Mars bar. This "one-bowl" approach, as some sources affectionately call it, streamlines the baking process significantly.
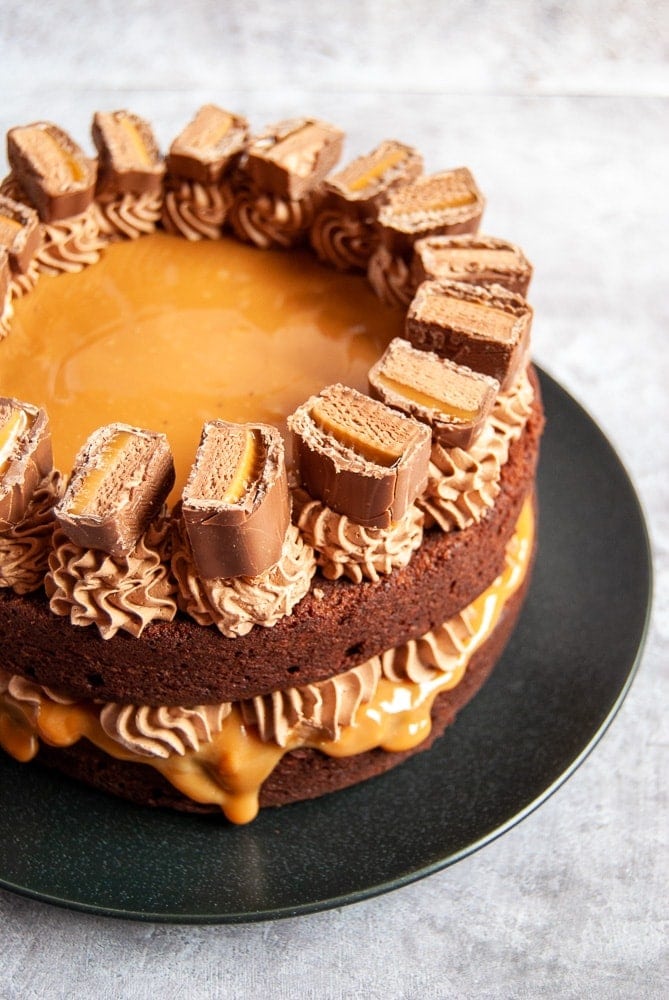
Typically, you'd prepare a standard chocolate cake batter according to packet instructions. The magic happens when you fold in sliced Mars bars, or even layer them within the batter before baking. As the cake bakes, the Mars bars melt, creating pockets of sticky caramel and nougat that infuse the cake with an unparalleled flavour and texture. This style of cake is often topped with a simple chocolate ganache or buttercream, perhaps adorned with extra Mars bar pieces for a truly decadent finish. It's the perfect choice when you crave that warm, freshly baked aroma coupled with the iconic Mars bar taste.
Decorating Your Mars Bar Masterpiece
Whether no-bake or baked, decorating your Mars Bar Cake is where you can truly let your creativity shine.
- Simple Elegance: A smooth layer of melted chocolate or a rich chocolate ganache provides a sophisticated finish.
- Mars Bar Mania: For the ultimate Mars bar enthusiast, sprinkle extra chopped Mars bar pieces (or even mini Mars bars) over the wet chocolate topping or ganache before it sets.
- Drizzle Delights: A contrasting white chocolate drizzle, or a caramel sauce, can add visual appeal and an extra layer of flavour.
- Kids' Creativity: If you have little helpers, let them get involved! Sprinkles, mini marshmallows, or even a dusting of cocoa powder can make the cake even more fun and personal.
Expert Tips for Mars Bar Cake Success
Achieving Mars Bar Cake perfection is straightforward, especially with a few insider tips:
- Choose Your Mars Bars Wisely: While standard Mars bars are traditional, experimenting with limited edition flavours (if available) or even other chocolate bars like Snickers can open up a world of new taste sensations. For more inspiration on quick and easy dessert ideas, check out our Mars Bar Cake - Article 1.
- Don't Skimp on Chilling: Patience is a virtue here. Allowing ample time for both the base and the topping to set in the fridge is crucial for clean slices and a stable structure. Rushing this step can lead to a messy, crumbling cake.
- Cutting Techniques: For the neatest slices, use a long, sharp knife. Dipping the knife in hot water and wiping it clean before each cut prevents sticking and creates crisp edges, especially through the chocolate topping.
- Make Ahead and Freeze: Mars Bar Cakes are fantastic for making in advance. The no-bake version can be made a day or two before your event and stored in an airtight container in the fridge. For longer storage, slices can be individually wrapped and frozen for up to a month, then thawed in the fridge when needed.
- Serving Suggestions: While delicious on its own, a slice of Mars Bar Cake pairs wonderfully with a scoop of vanilla ice cream, a dollop of whipped cream, or a warm cup of coffee.
- Troubleshooting Sticky Situations: If your chocolate topping seems too thick or isn't spreading easily, gently warm it slightly over the double boiler again. If your Mars bars aren't melting, increase the heat slightly, but continue to stir vigorously with a whisk. If you're looking for even more innovative ways to use this iconic chocolate bar, our Mars Bar Cake - Article 2 offers fantastic alternatives.
Conclusion
From its humble beginnings as a retro classic to its enduring popularity in modern kitchens and cafes, the Mars Bar Cake remains an undeniable favourite. Whether you opt for the simple, crunchy no-bake version or a rich, baked chocolate cake studded with gooey Mars bar pieces, you're guaranteed a dessert that delivers on indulgence, nostalgia, and sheer deliciousness. So, gather your ingredients, follow these steps, and prepare to create a Mars Bar Cake that will bring smiles and sweet memories to everyone who takes a bite. It truly is a treat that never goes out of style.